Setting up github custom domain
Sep 11, 2022·4 min read
Setting up a custom domain for our github pages has lot of benefits but at the same time it requires lot of patience. This article aims to give a picture about how the entire thing works and step-by-step guide for the same. I am taking my github profile Gokuldroid and my custom domain codefromdude.com as example here.
Reasons on why you need to setup custom domain for your github page
- The default domain provided by github <username.github.io> is not intuitive.
- We will lose all google indexing if we want to move away from github.
- For more personal branding.
- And we're devs and we want problems ;-).
Prerequisites
- Github account
- Cloudflare account (github doesn't support SSL termination for custom domains. we can use cloudflare to do the SSL termination for our blog for free)
- A repository (
.github.io) with two files (index.html and CNAME) - A domain registered in any providers (Ex, Godaddy, Namecheap, Cloudflare etc)
- Bit of patience.
Setting up your github repository
(skip this if you already have site published at <github-user-name>.github.io)
-
First you have to create a public repository in this format
(<github-user-name>.github.io -> gokuldroid.github.io) -
clone github repo locally using this command and
cdinto the folder and createindex.htmlfile
git clone https://github.com/<your-github-username>/<your-github-username>.github.io
cd <your-github-username>.github.io
touch index.html- Add a
index.htmlin the root folder
<!DOCTYPE html>
<html lang="en">
<head>
    <meta charset="UTF-8">
    <meta http-equiv="X-UA-Compatible" content="IE=edge">
    <meta name="viewport" content="width=device-width, initial-scale=1.0">
    <title>Document</title>
</head>
<body>
    <p>Hello world</p>
</body>
</html>- Push the changes to remote
git add --all
git commit -m "Initial commit"
git push -u origin main- Fire up a browser and go to
https://<your-github-username>.github.io. Now you have successfully setup a personal page in github.
Setting up domain in cloudflare and github
- create CNAME file with your custom domain (should be in single line without any spaces. reference).
cd <your-repository>
echo "<your-custom-domain>" > CNAME
git add --all
git commit -m "Add CNAME file"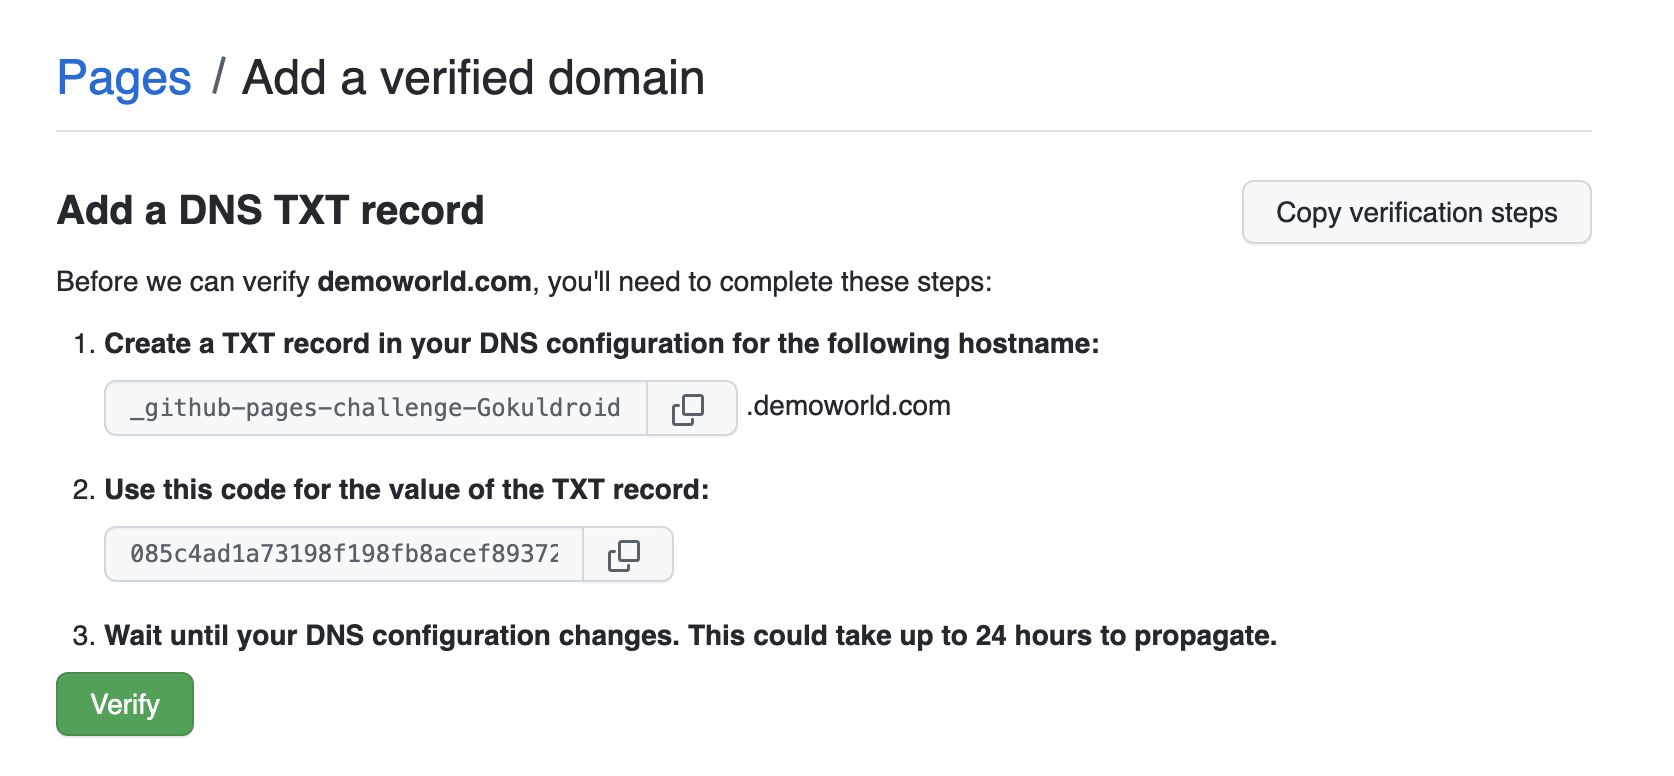
git push -u origin main- Go to github profile settings -> Code, planning, and automation -> Pages -> click on
Add domain - Type your custom domain name -> click
Add domain. This will take you to the following the page like this. we need this txt record and value for the next step. keep this handy.

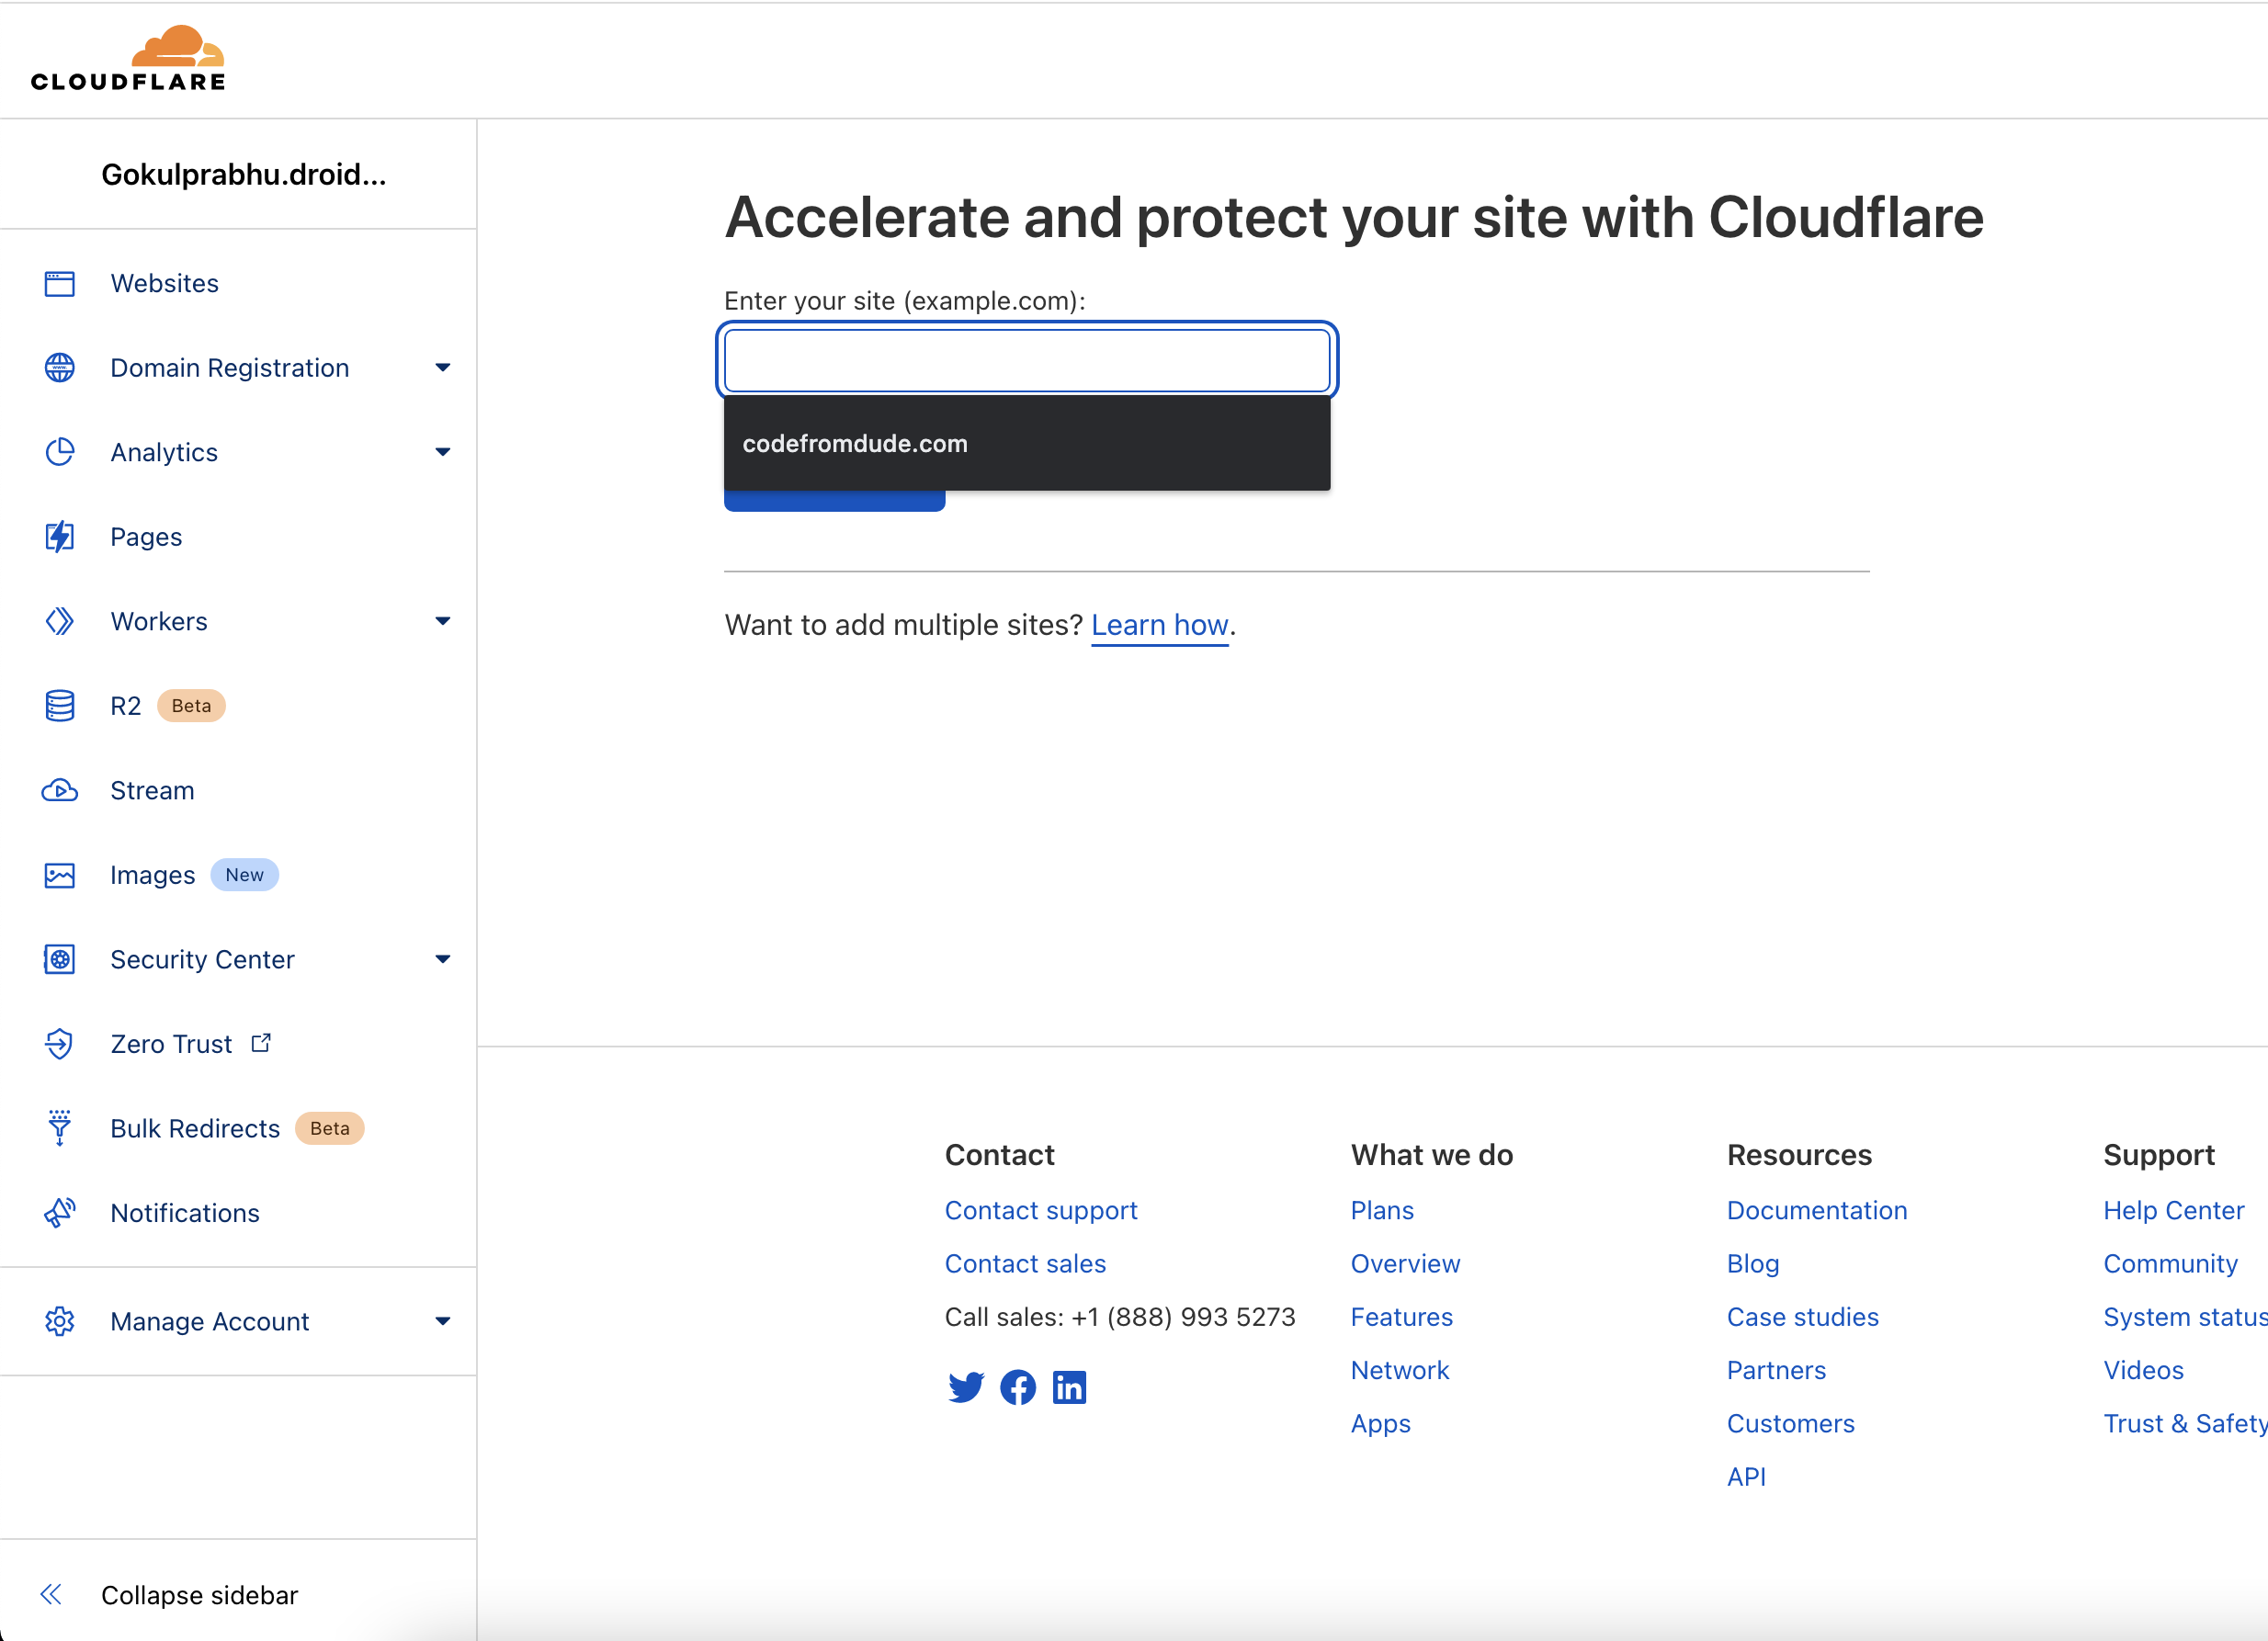
- Go to cloudflare -> websites -> Add website -> Type your custom domain -> click on next.
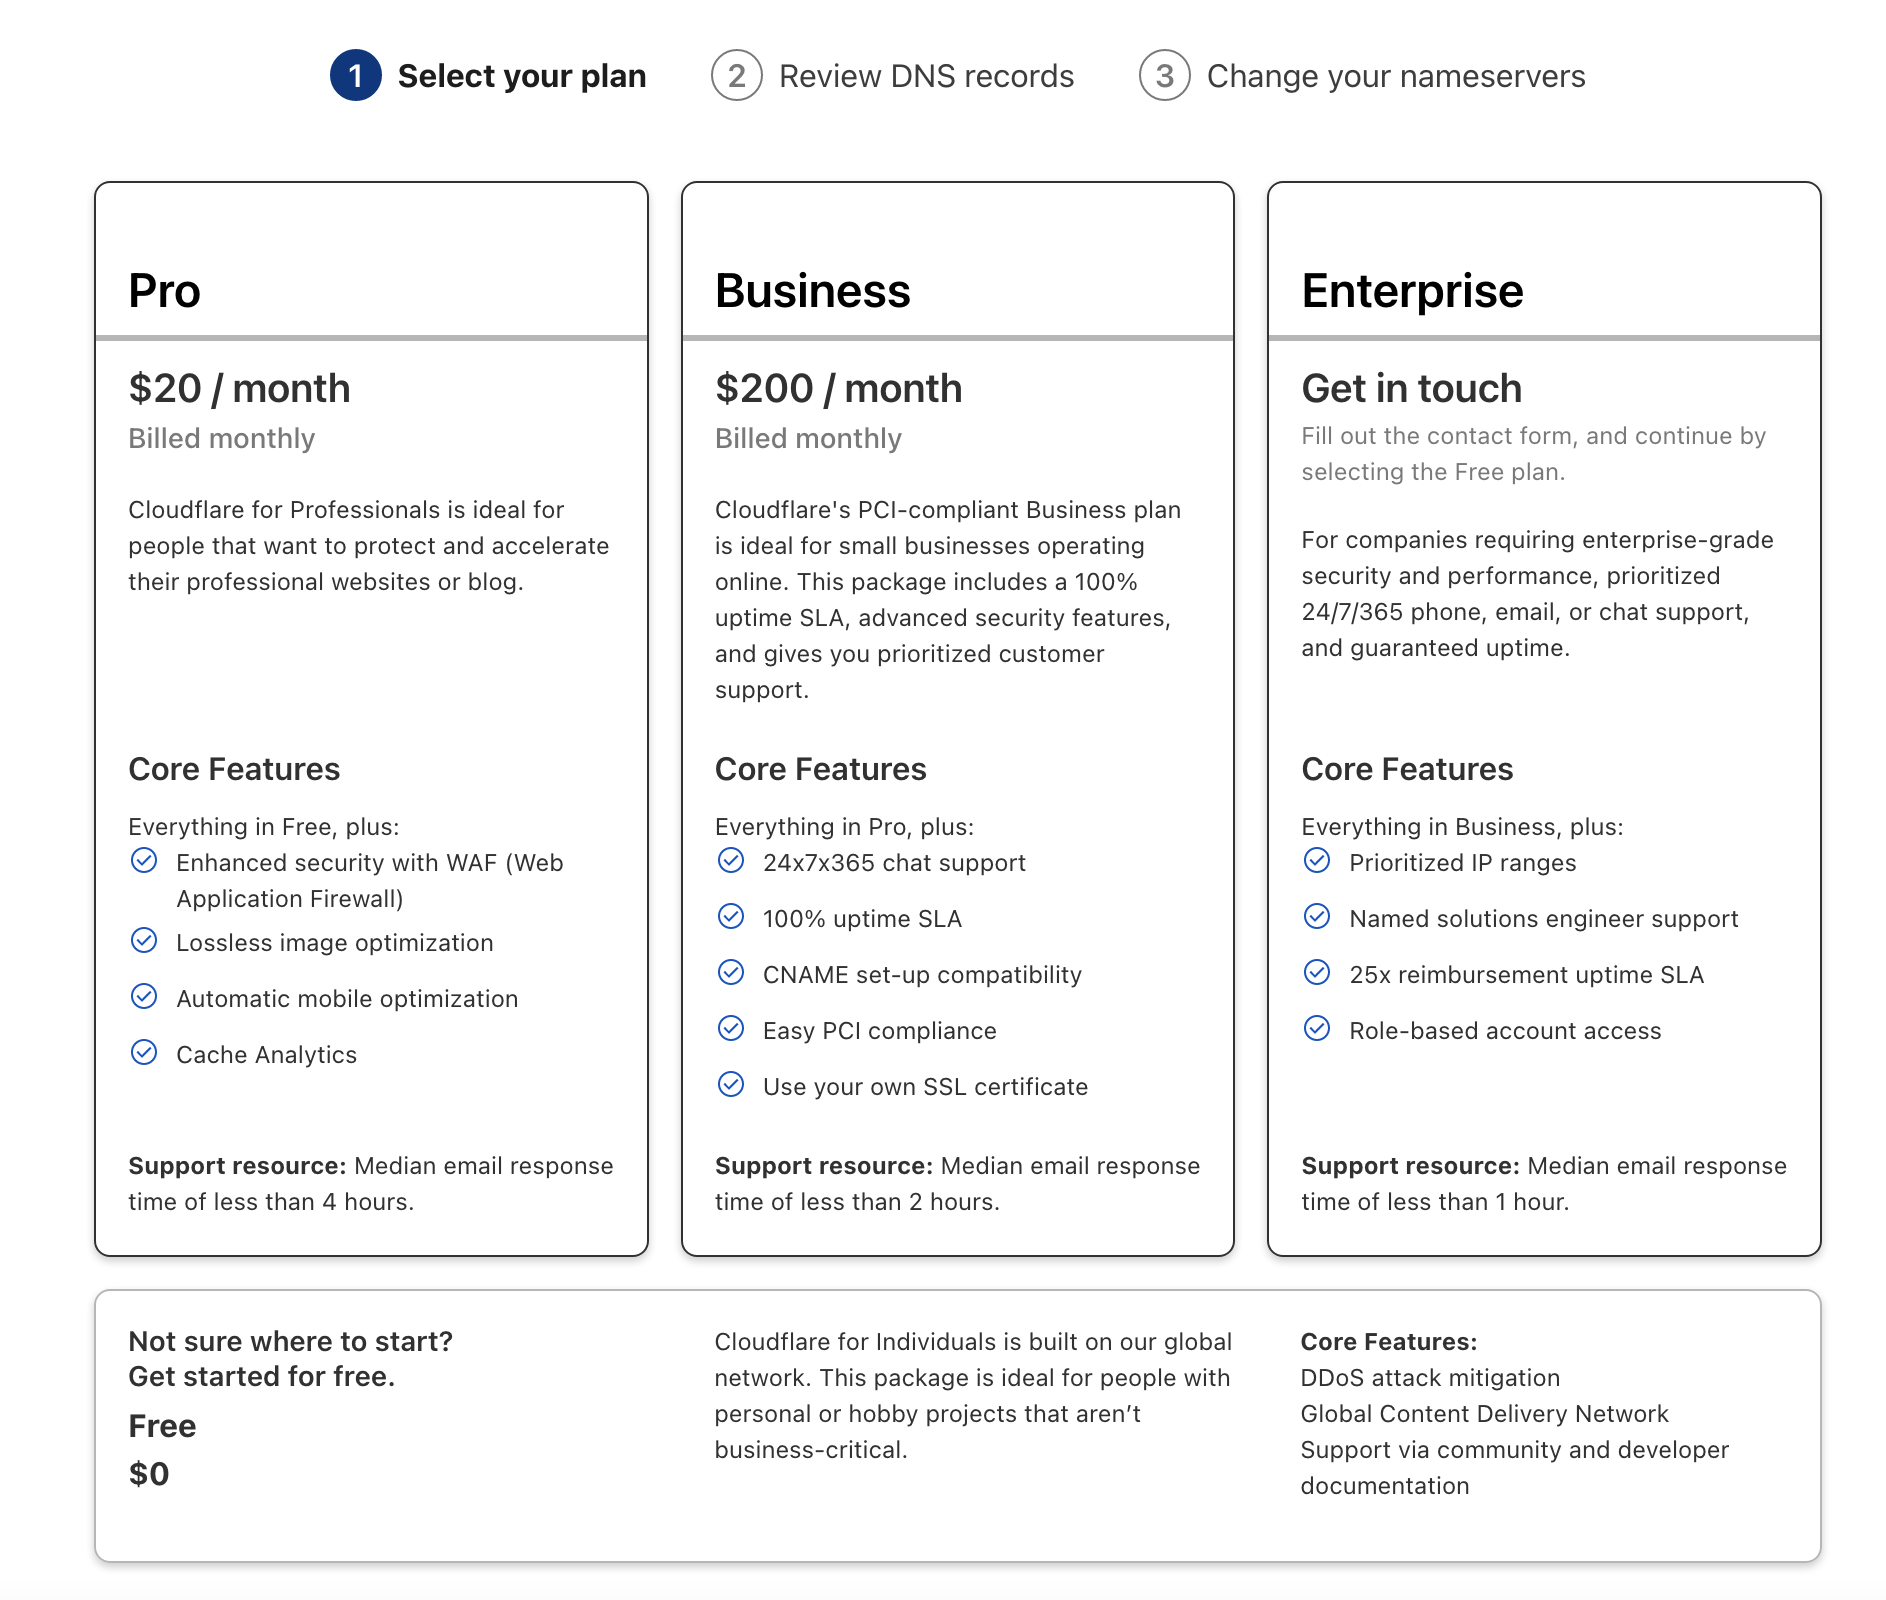
 - Select your plan that you need. (you can choose free plan)-> click next.
 - Configure DNS records like shown in the below picture or you can simple modify the following (dns-text-records.txt) and import in cloudflare DNS manager (you need to modify custom domain, github username and txt record from the above step).
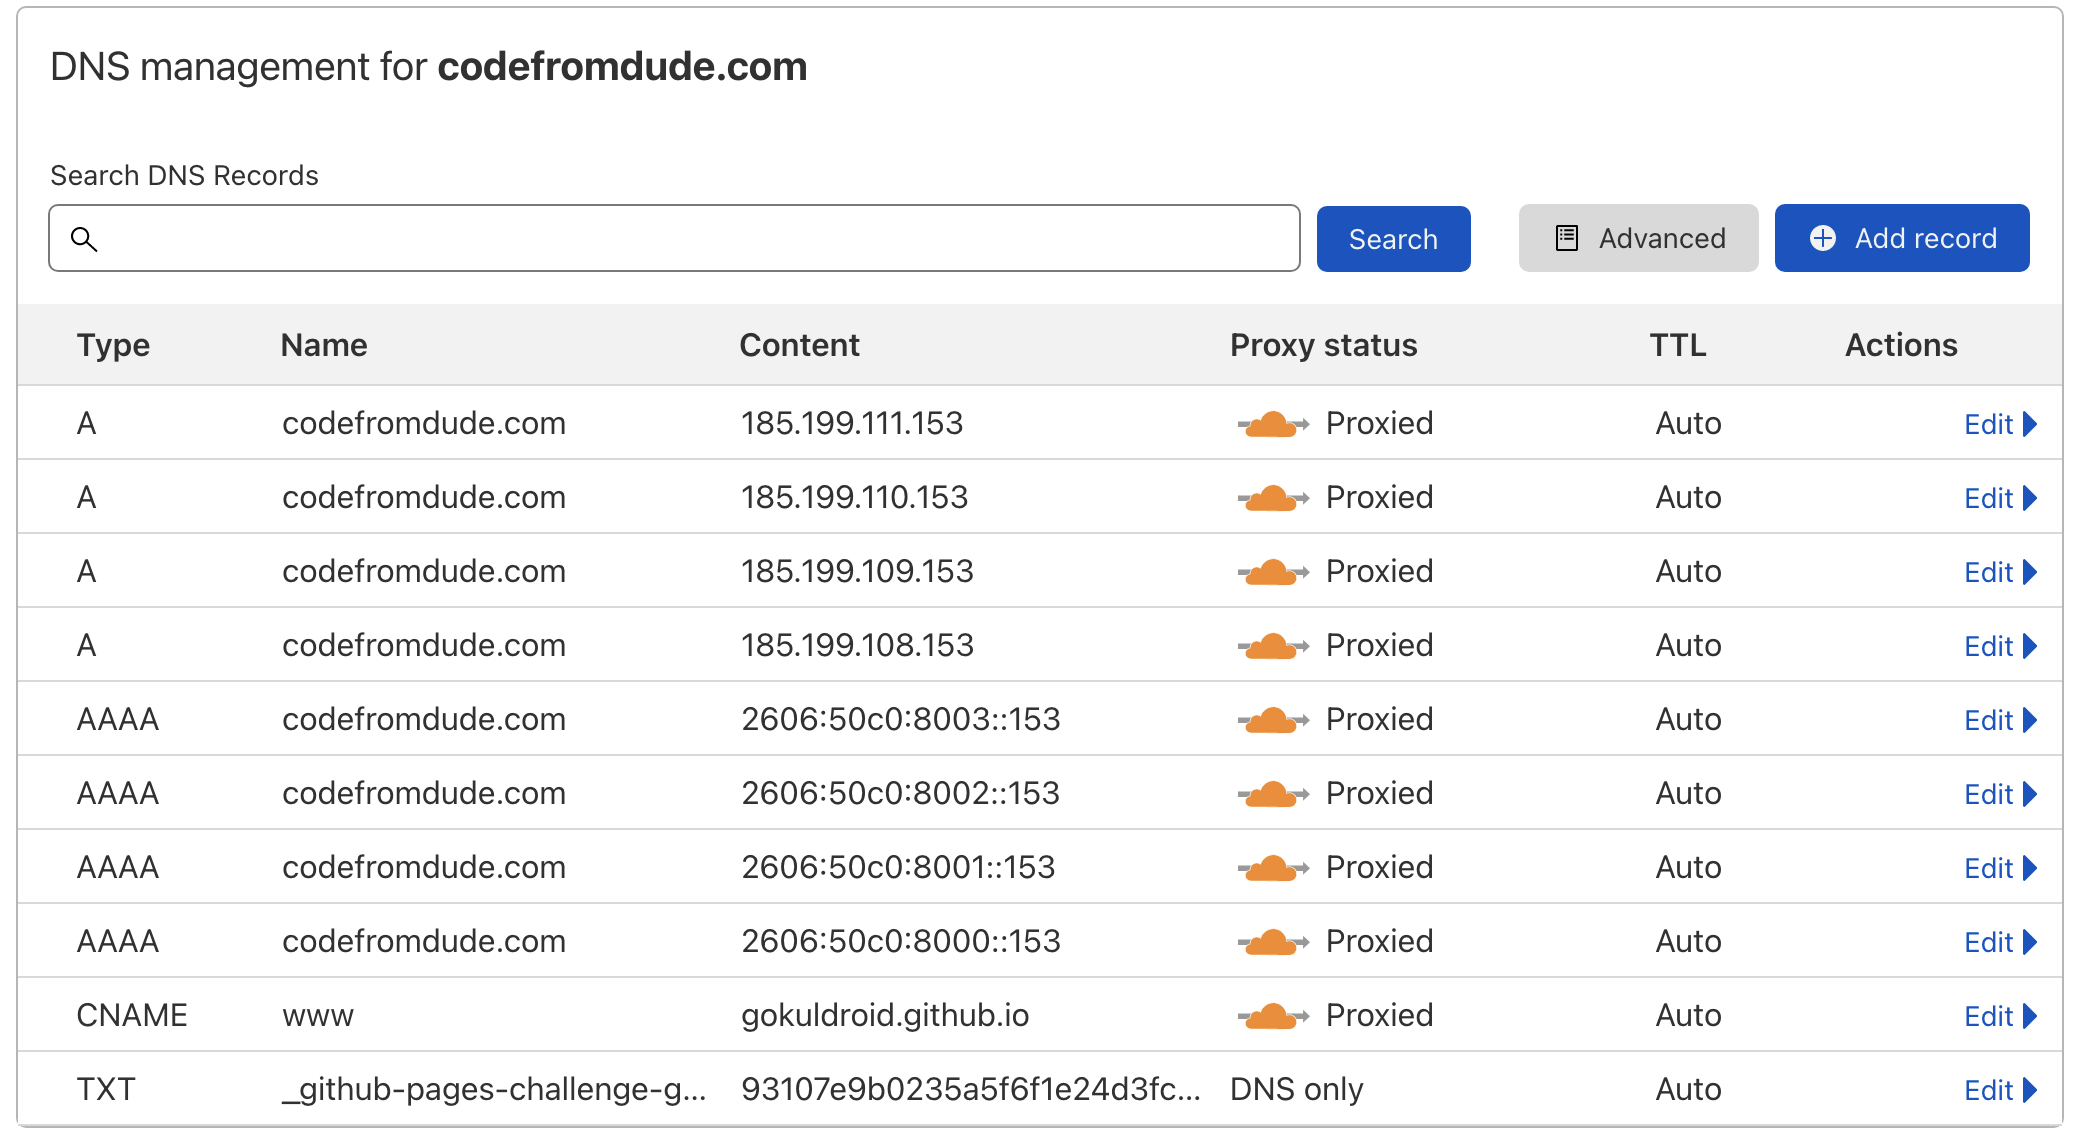
A records
185.199.111.153
185.199.110.153
185.199.109.153
185.199.108.153

AAAA records
2606:50c0:8003::153
2606:50c0:8002::153
2606:50c0:8001::153
2606:50c0:8000::153
dns-text-records.txt
<your-custom-domain>	3600	IN	SOA	<your-custom-domain> root.<your-custom-domain> 2041457699 7200 3600 86400 3600

;; A Records
<your-custom-domain>.	1	IN	A	185.199.111.153
<your-custom-domain>.	1	IN	A	185.199.110.153
<your-custom-domain>.	1	IN	A	185.199.109.153
<your-custom-domain>.	1	IN	A	185.199.108.153

;; AAAA Records
<your-custom-domain>.	1	IN	AAAA	2606:50c0:8003::153
<your-custom-domain>.	1	IN	AAAA	2606:50c0:8002::153
<your-custom-domain>.	1	IN	AAAA	2606:50c0:8001::153
<your-custom-domain>.	1	IN	AAAA	2606:50c0:8000::153

;; CNAME Records
www.<your-custom-domain>.	1	IN	CNAME	<your-github-username>.github.io.

;; TXT Records
_github-pages-challenge-<your-github-username>.<your-custom-domain>.	1	IN	TXT	"<text-record-from-github-domains>"
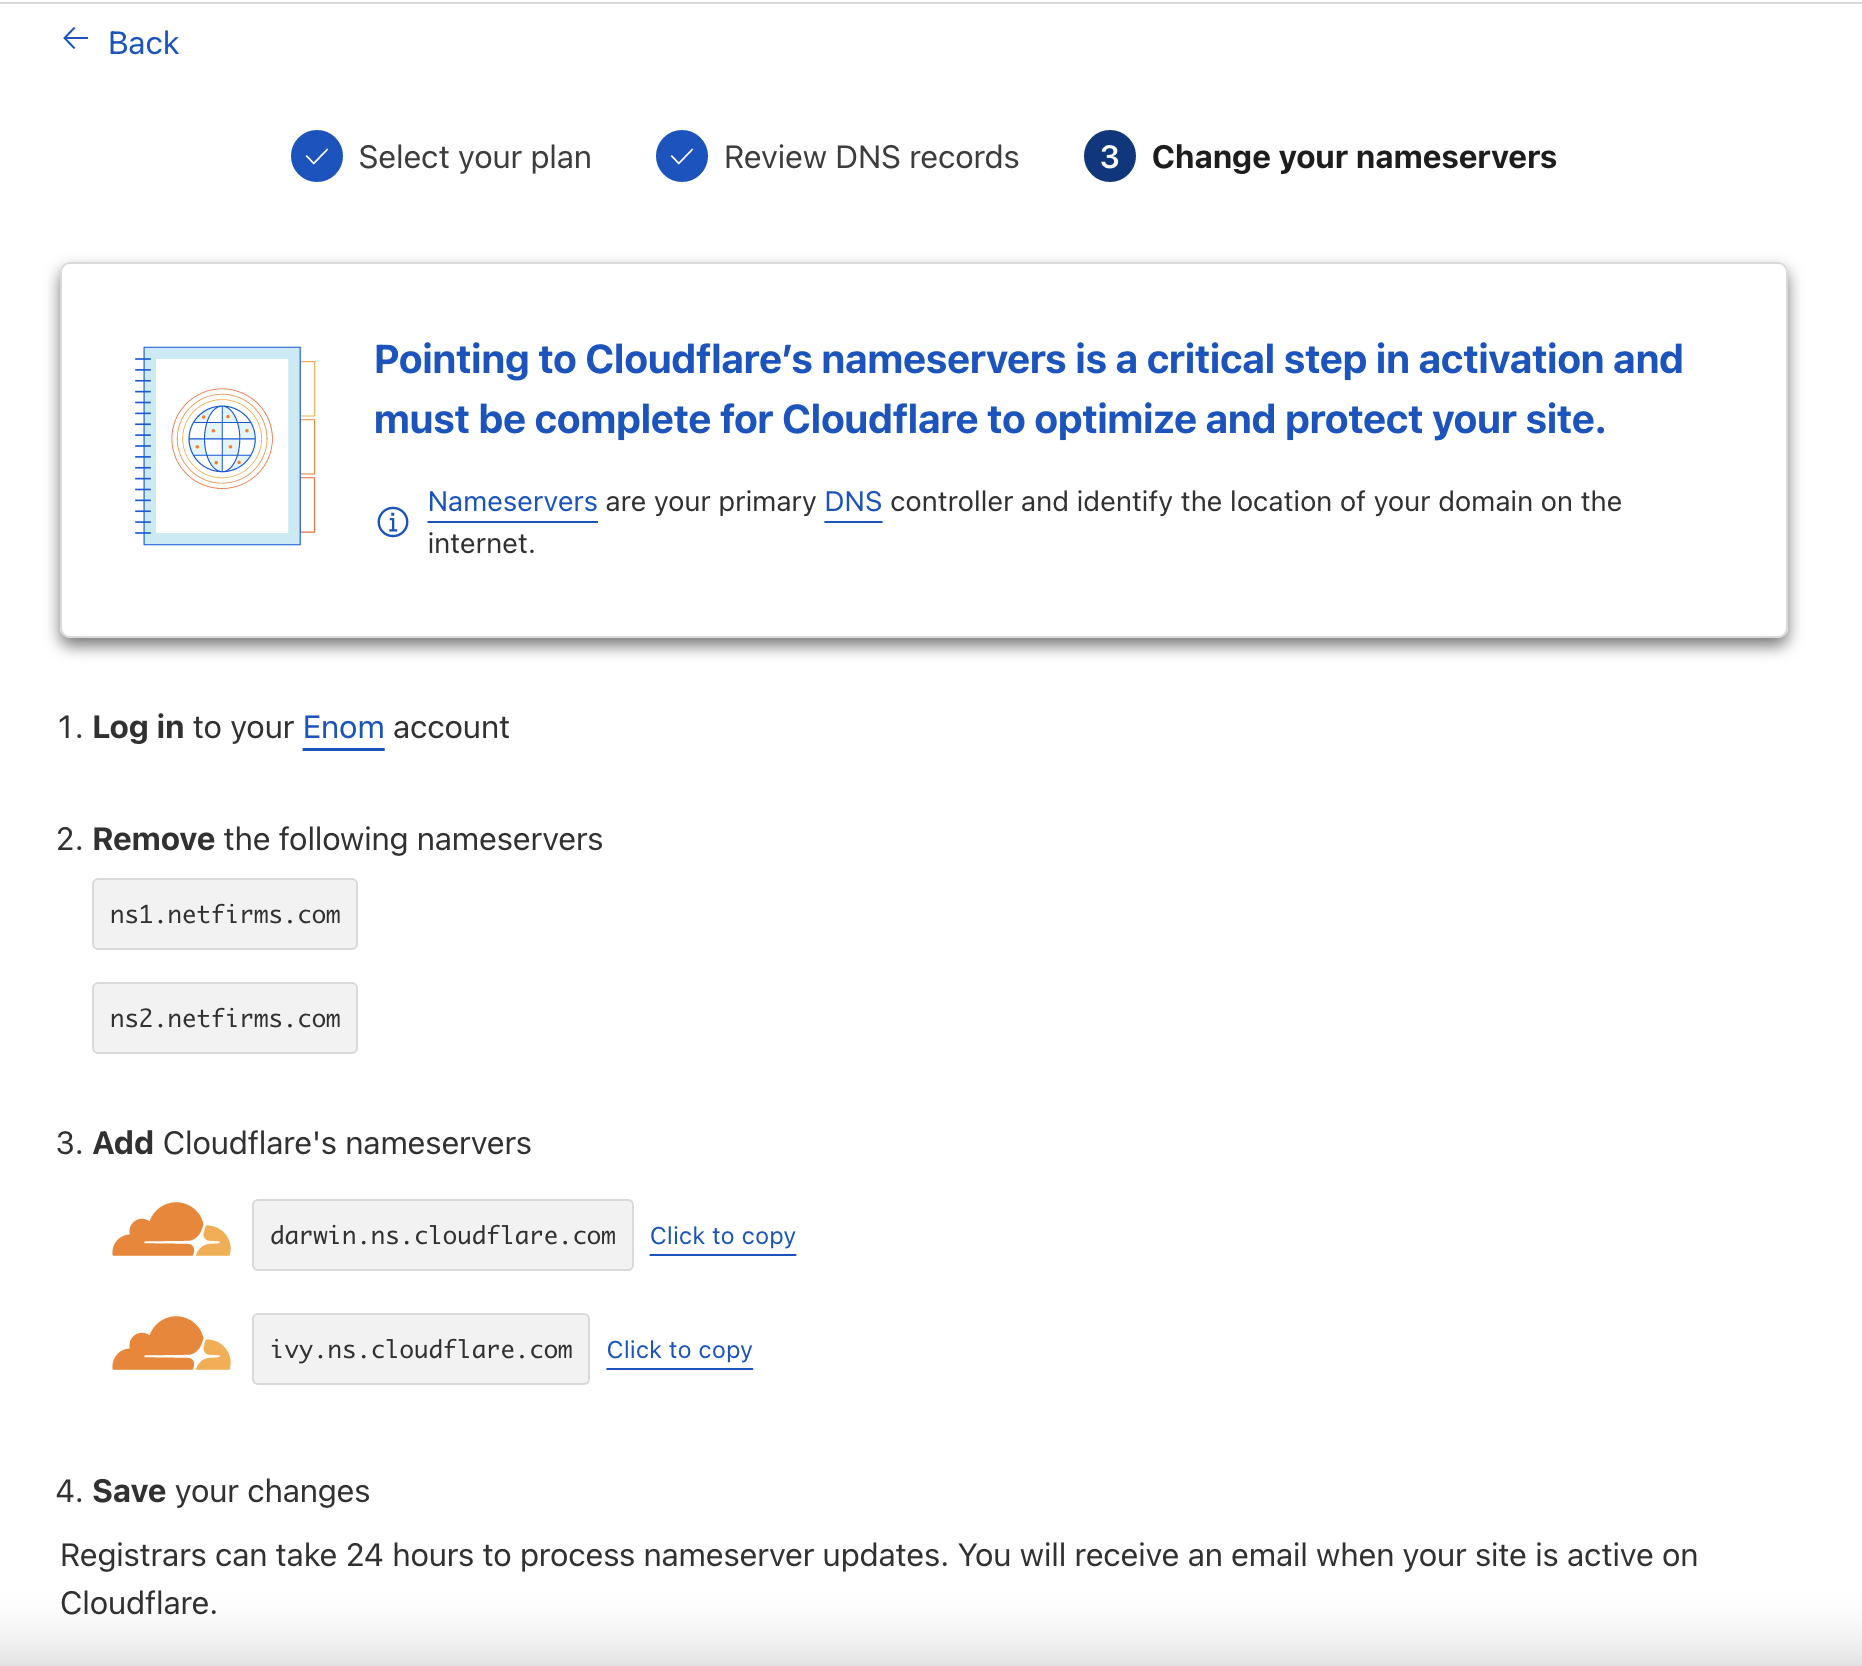
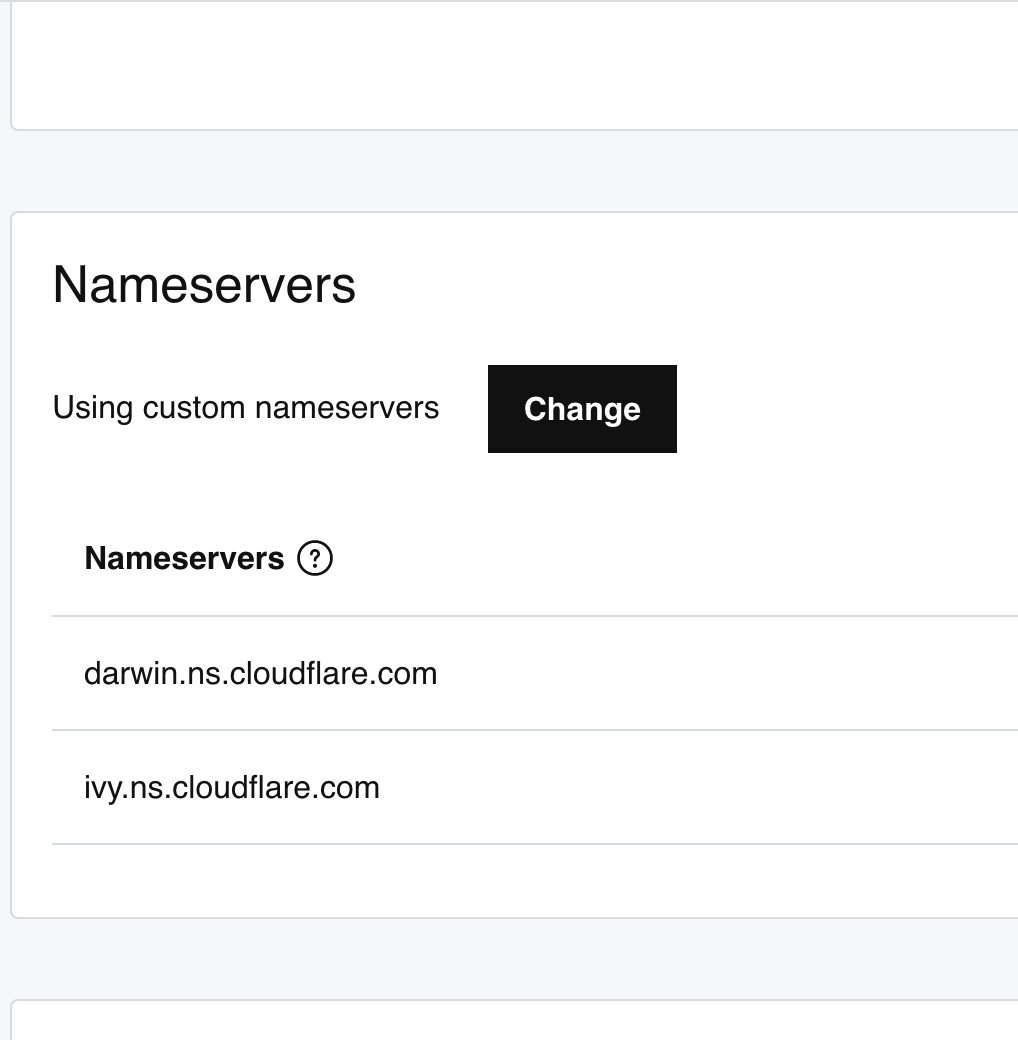
- Copy the name servers in cloudflare and Configure it in your domain provider. (For example I am using godaddy for my site). Once you configure this DNS will be manged by cloudflare. This is critical since all the above configuration won't work if you miss this step.
This will take few hours to take effect.
-
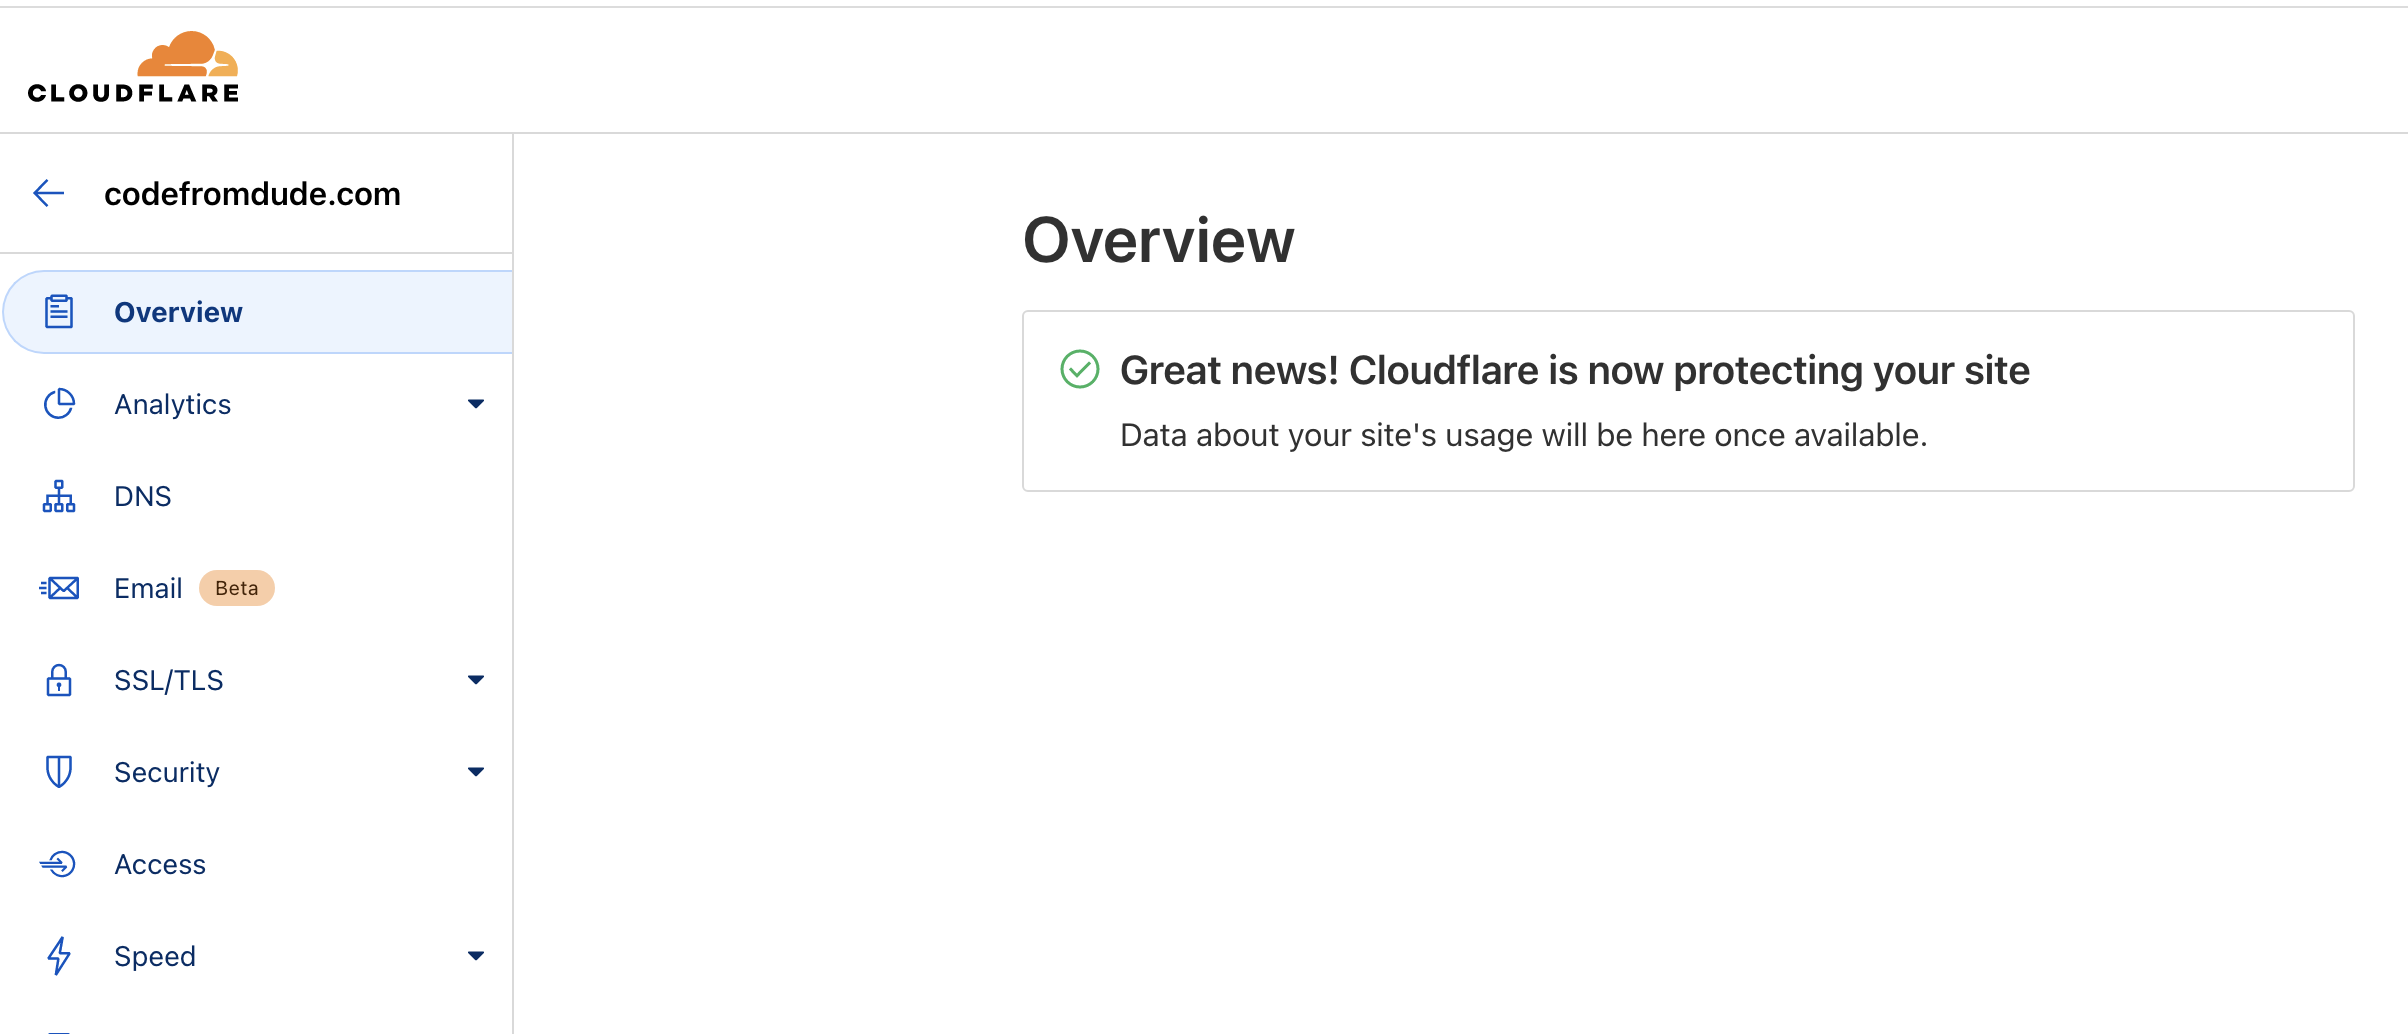
- once the nameserver changes got propagated, you can verify the same in cloudflare console. once you verified, the site will be active in cloud flare. till now we have configured the domain provider and cloudflare.
 - Now, head back to github and verify the domain in your profile settings. If not able to do this, wait for sometime for the cloudflare changes to propagate.
- Once you verified the domain in github, configure the same in github repository settings under custom domains settings.
- Now, head back to github and verify the domain in your profile settings. If not able to do this, wait for sometime for the cloudflare changes to propagate.
- Once you verified the domain in github, configure the same in github repository settings under custom domains settings.
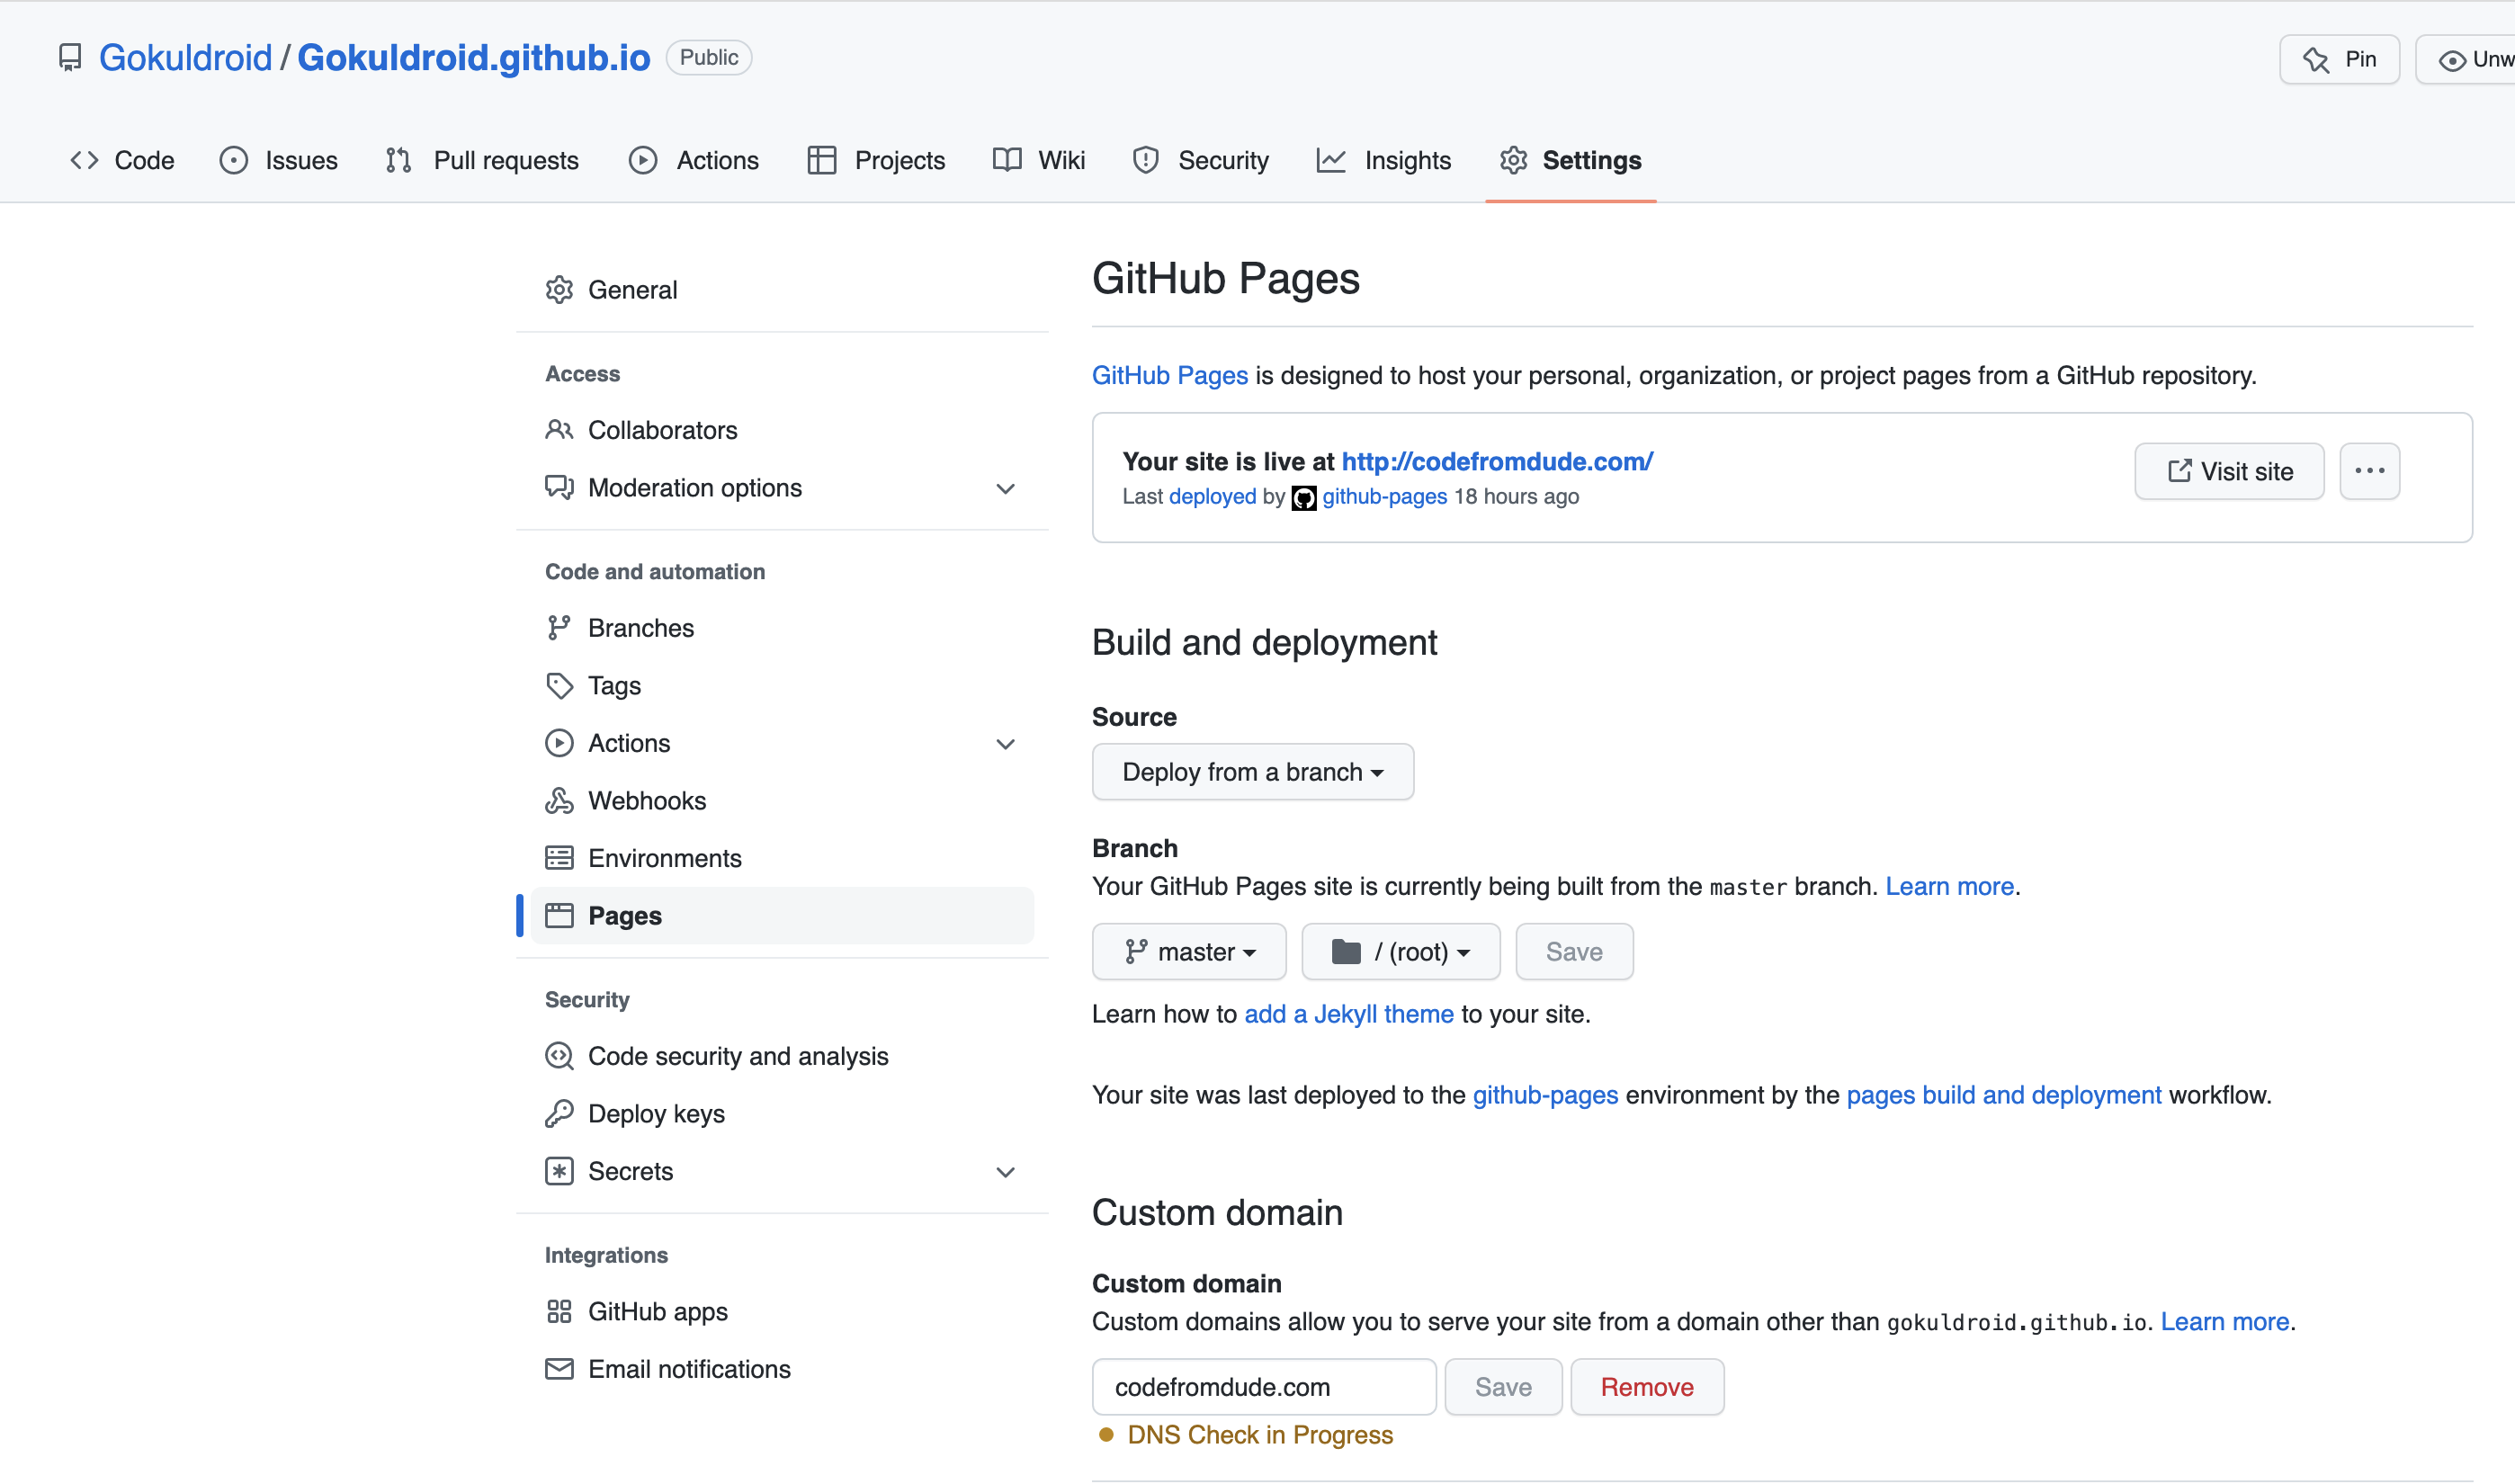 - Congratulations, now your github site will be serving with your custom domain. you can enable HTTPS settings in cloudflare and github repository settings to serve HTTPS by default.
Share this article